

Tuesday, March 27, 2012

Monday, March 26, 2012
Birthday #6
My oldest turns six today. Six years old. For six years, this child has roamed the globe. I can't believe it. Birthdays are always filled with mixed emotions for me.
I am so proud of him and all he's done this past year. It's been a crazy life and all things considered I think he's handled everything pretty fantastically.
When he was three months old, we drove to Michigan to visit before Matt was deployed.
Then when he was five months old, we moved back to Michigan after Matt left.
He flew back to North Carolina with me to visit old friends.
We flew to Tennessee for a military funeral.
He celebrated the first birthday getting reacquainted with his "Da-da" for the two weeks R&R mid-deployment.
Six weeks later, he moved to D.C. with me.
We lived out of a hotel and hospital while Matt recovered from his injuries.
He was the constant reminder of the love Matt and I had together. The life we had made together.
After leaving D.C., we spent another month living out of a hotel in Richmond, VA.
He learned to walk at a day care center I had put him in during the days I spent helping Matt through rehabilitation.
When we moved back to North Carolina, he was in tow, happy as ever.
His second birthday was spent at Chuck E Cheese, surrounded by our military family.
We moved twice while at Fort Bragg, drove and flew back to Michigan twice before his third birthday.
He was my companion, my travel partner.
At his third birthday, I had started working at Barnes and Noble (the first time I worked since he was born) and he started day care. He hated it and it broke my heart.
This was his first birthday party with a theme (Transformers) and friends. I couldn't believe how big he was then. How much we'd been through and how happy and well adjusted he was.
When Matt came down on orders to South Korea, we had no idea what would happen or how it would change our lives.
Before we left for S.K., we spent the summer in Michigan again, knowing we wouldn't be visiting friends or family for a long time.
He has always traveled well, but I was surprised how well he handled the constant car trips.
When we left our homeland for the foreign adventure of living in South Korea, he was there, always encouraging us to be positive and keep an open mind.
We found out I was pregnant shortly after arriving and he was over the moon.
His fourth birthday was a hard one. The winter in South Korea was long and we hadn't met any friends yet. All he wanted for a present was to meet some kids his age. It broke my heart.
Once the spring hit, we enrolled him in tee ball. He was so pumped to be around kids his age!
Shortly after that, his brother was born and they were instantly friends.
He was born to be a big brother, so helpful and caring.
As our time went on, he made more friends and before we knew it our time in South Korea was over.
The military life was starting to wear on him.
Flying internationally 25 weeks pregnant with both boys (alone) was probably the hardest thing I have ever done, but it was no sweat for Gabe. He was so helpful and patient in every way.
And then, he started Kindergarten. My heart swelled with pride as he entered the Elementary in Kansas on his first day.
With no hesitation, he fit right in with new friends and a new life.
Shortly after Matt came back from South Korea, we welcomed our baby girl into our lives and Gabe loved her instantly.
And then we moved (again) to Texas, he transferred schools and had to make friends all over again.
But it didn't stop him.
Gabe is the same little boy he's been his whole life. Ever so kind and caring. Always friendly and smiling.
He is the definition of resiliency and constantly reminding me to be positive.
I am so grateful to have him in my life, to have the honor of watching him grow into a man. I have a heavy heart today because I know that day he becomes a teenager and then man is coming faster than I am ready for it to. With a blink of an eye, he'll be graduating high school and moving on with his life, and I'll be here wondering what just happened.
I know it's coming (my head knows anyway), so I am here today, enjoying that's it's only his sixth birthday and not his sixteenth.
Not yet anyway.
Saturday, March 24, 2012
Spring Break fun
Painting with this cornstarch/water/tempera paint mixture was so much fun for the boys. We did it again for Gabe's birthday party. The link below says to put the paint in spray bottles, but we just used paint brushes. I have halved and fourth'ed the recipe because a little goes a LONG way. If you don't want to have a lot left over, I suggest you cut down the cornstarch and water, but keep the tempera paint the same otherwise the color is really faint.

Bubbles are always a huge hit and I'm so glad I made the big batch and saved it in a bigger container, only pouring out a little at a time. Bubble mix = 2 1/2 cups water, 1/2 cup corn syrup, 1/2 cup dish soap.


I ended up making the rock candy, but the boys picked the colors. Just a warning, this recipe makes A LOT of sugar-water. Because you have the sugar to water ratio of 3:1, I used 9 cups (a whole bag) of sugar to 3 cups water. I only had 6 jelly jars ready to pour the mixture into, but I think it would have made 9 total. Otherwise, I followed the blogger's advice to roll the Popsicle stick in sugar before putting it in the jelly jar. It took 7 days for us to get significant crystals. I think if we decide to make it next time, I might add a flavor extract to the mixture.

Soaking up the sun and warm weather

We got together with friends and planted vegetables and strawberries in empty milk and juice containers. It's a great way to reuse old plastic. Also, it's a great way to get the kid's involved in planting. They were able to scoop the soil into the planters, plant the seeds and water them all by themselves. I'm so glad the strawberries are thriving, no progress on the peas yet.

The nights were nice and warm. Warm enough for the boys to have squirt gun fights into the night.

The last day of spring break, we went to Biggs Park on base. It is AWESOME! The park is completely covered, so we don't have to worry about the intense heat of the sun. The equipment is brand new and clean. It was lots of fun for everyone! We made a picnic of it and spent most of the morning there.


We had a great break, it was hard to get back into the school routine. Only a couple more months until he's done with Kindergarten. It's hard to believe but exciting at the same time!
Here are the links to activities we did over spring break:
Thursday, March 8, 2012
Make Your Own: Chalkboard - Dry Erase board
I have become obsessed with using picture frames as dry erase boards (thank you Pinterest). I have a grocery list and weekly calendar hanging in the kitchen, along with Gabe's job chart.
TIP: I found that if I write my grocery list on the dry erase board and then take a picture of the list on my phone, it's WAY easier to keep track of this list than an actual piece of paper. My purse is a black hole - many a list, cookie, diaper and writing instrument has been lost inside. Where they come out? I would like to know, I'm sure there's a pile somewhere.
Back to the point.
I decided a while ago that I wanted to use these old, banged up frames I had to make something for the boys to use. After finally having both the supplies and time, I was able to complete this project of turning picture frames into a chalkboard on one side and a dry erase board on the other.
I started by spray painting my frames. The only reason I did this is because the wood and paint on the frames were chipped. If you're not worried about it, or have perfectly nice looking frames, skip this step. Then I spray painted the backings of the frames with chalkboard spray paint. It took a couple coats to get the nice dark chalkboard color. I'm definitely no expert at spray painting, but I noticed that the paint came out much smoother if the boards were vertical rather than standing over them and spraying. Maybe that's the way you're always supposed to spray paint? Like I said, I'm a beginner spray painter.

After the spray paint dries completely (I ended up doing three coats and left it in the garage overnight to dry), you need to coat the surface so the chalk will adhere to the paint better. I took the long edge of the chalk and brushed it against the backing until it was completely covered. Then you wipe the chalk off with a paper towel and the board is set. You can now draw on it until your hearts content!

Then you just put your frame back together. I measured and cut off a piece of blank white paper to go inside the frame for the dry erase part, but you could decorate that piece of paper with dot to dots or coloring book pages. After they were assembled, the boys had lots of fun with their new toy.


These frames are pretty big, but you can definitely use something smaller. I can't remember how much I bought them for at Target a couple years back, but I know you can buy 8x10 frames at the Dollar Tree. If you don't like the design they come in, just spray paint them or recover them in fabric.
Like I always say, just be creative! That's half the fun!
OH, and if you see below, I now have a "pin it" button on ALL my blog posts. Be sure to "pin" your favorite ideas!
Monday, March 5, 2012
Make your own: Children's art display board
Between Pinterest, Etsy, Very Jane and other craft websites, I've seen a lot of these boards you can hang or display children's art and/or pictures from. The problem with buying one from a vendor is that they usually run around $30. So I took a trip to Hobby Lobby determined to figure out how to make one for myself.
Supplies I bought (all costs are estimates, I can't remember exactly):
1 plain wooden board - 6in x 36in ($7)
1 can black spray paint ($5)
1 pad of 300 letter stickers ($8)
1 can aerosol paint sealer ($5)
Supplies I already had:
1 tube cream acrylic paint
1 silver paint pen
1 glue gun
5 regular clothespins
Originally, my plan was to paint the board in cream and arrange the stickers over the board, then spray paint black over the whole thing and remove the stickers once the paint dried to have the sentence read in cream. It didn't work as well as I wanted. From here you can't tell, but you could see where the cream paint started and stopped underneath the black spray paint. Also, the letters weren't as crisp as I wanted them to be, the sides around the stickers had leaked from the paint and blurred the edges. So I had the idea of tracing the outlines of the letters with a silver paint pen. This worked well, but I wasn't a huge fan of the color combination between the cream and the silver. Also, I wasn't genuinely excited about the plainness of the black board with the little coloring of the letters. Before I placed the clothespins, I decided to spray paint sealer over the entire thing, hoping it would create a gloss effect and blend in the start and stop lines from the cream paint under the black spray paint. After I let it rest for the 24 hours, I hot glued my clothespins (9 inches apart) and hung up my board. The kids were so excited to see it up, we immediately found art from playgroups and school to fill our display board. This is the finished product (the first time around):

The board didn't make it a full day before coming apart. In my attempts to "pretty" it up, the hot glue from the clothespins never fully adhered to the board because of the sealer and all five clothespins were the first to fall off. Then, in my haste to display my completed project, I didn't secure the board well enough to the wall and the rest fell down.
It took me a couple days, but I was determined to make it work. So I started over on the back side of the original board.
This time, I decided to use four different colors of scrapbook paper I already had. The dark and light silvers are 1 inch thick, the white is 2 inches and the blue pattern is 1/2 inch thick. Then I arranged them in a way I thought was interesting but would work with the black letter stickers (Thankfully the pack I bought at Hobby Lobby had enough for two complete sayings). I secured the paper to the board using tacky glue and folded the ends over and around the back of the board, securing the ends with hot glue.

I figured out how long my saying would be from the messed up back side and measured it out so I would have enough space and not have to rearrange my letters. Also, I measured 2 1/2 inches from the top for the bottom line I would place my letters on. I figured out that the easiest way to ensure even spacing between letters and words was to start at the beginning and end and work towards the middle. It helps gauge how much space you have to work with. I didn't want to draw a line on my papers, so I used the broken shelf from my freezer (note to self: Even though the shelf does a good job of holding a steady line, no more cramming frozen fruits and veggies in the door of the freezer).

As you can see from the finished saying, I ended up moving the "made" more towards the middle of the board when I saw the amount of space I had. If you end up losing the adhesive of your sticker letters, you can always use a glue stick or tacky glue.

The (finally) finished product! I'm unhappy with the way the picture turned out. The reflection of the overhead light in the stickers makes it looks red and the dark silver look black. But this is just so you can get the basic idea.


Full of proud children's artwork!

In the end, I am really happy with the way it turned out with the scrapbook paper. I like the four colored stripes and am glad I decided to try and make it myself.
My recommendations:
If you decide to recreate this board, you are more than welcome to try paint, but I suggest using only one type of paint, either acrylic or spray paint, and definitely no sealer.
The stickers worked wonderfully for the lettering. I've also seen vinyl lettering. Or if you have good penmanship (I do not), you could use a paint pen.
When I hot glued the clothespins to the board (the second time), I covered the back of the pin and also glued around the sides after placing it on the board. I'm hoping this will help secure them. So far, there hasn't been any movement of the clothespins.
There are a multitude of sayings you could put on your board.
Examples include:
-Look what (name) made
-Masterpieces
-Wall of Fame
Most of all, get creative!
My next task is to figure out how to include a "pin it" button on my posts!
Saturday, March 3, 2012
Soccer games #2 and #3


Gabe had soccer games last Saturday and this past Thursday. These twice a weeks are really starting to wear on us (what with the chilly winds at night), but thankfully Gabe is still just as excited as when he started the season. He still gets a little anxious when he sees the ball headed his way. I call it the soccer shuffle. It seems like when any of the kids see the ball coming to them, they can't decide which foot to kick it with or if they should wait for the opponent to kick it or if they should block the kick. The moment of panic, shock, confusion and excitement all at the same time that seems to freeze their brain. "Wait, what do I do again?" You can just see it in their faces. It makes me happy. And giggle a little.
He has decided that his favorite position to play is goalie. I wasn't sure of why until he got to play it at the end of his game on Saturday. Gabe's soccer team is really good. Good enough that their defense and goalie doesn't get much action. In fact, for the whole last part where Gabe got to play goalie, the ball didn't cross the center line of the field. Not once. Gabe stood in the goalie box and danced and goofed around. While the assistant coach was trying to keep him focused, there was absolutely nothing for him to do other than dance around and dramatically die.
Thank goodness that these coaches have the patience of saints.
Thursday, March 1, 2012
Perfection in recipes
I know it has been awhile since I've gotten any DIY and food recipes posted. I've been working on the family and active portions of my "more" resolutions. Gabe has started soccer (two nights a week) and I'm attending playgroups and other activities a couple times a week. Making me a very busy (but very happy) mom.
I have made my laundry detergent, but have had a couple set backs in making it. The recipe I used was very unspecific about the size of the bar of soap you use and unfortunately my bar of soap was twice the size of the bar called for in the recipe. What this does is thicken the detergent from a gel to almost a solid. However, after some research I found that I can still use it by diluting it in a smaller container. I scooped out four cups of detergent into an old empty plastic juice container (filling it about halfway with detergent) and then filled the other half (leaving a little room for bubbles) with piping hot water. Then I shook the mixture to help dissolve and dilute the soap. I have used the mixture twice since diluting it and I am pleased with the results. The clothes are getting clean and unstained. I love that I don't have to worry about the dye in the detergent anymore. From now on, I think I will use this recipe to make my detergent, but I definitely have awhile before I'll need anymore.
I also found that dishwasher detergent ingredients are very similar to laundry detergent and have made my first batch of that. Here is the link I used to make mine. I love the idea of adding vinegar to the bottom of the dishwasher, it has made my glasses sparkling clean. From the same blogger, I found a homemade stain remover recipe. I tried using a squirt bottle to spray this on our stained clothing, but the baking soda clogged the straw. I found that just shaking the bottles contents and pouring a little onto the stained area works just as well. I rub the stain a little and let it sit for a couple hours before I put it in the washing machine. I'm really surprised how well it's worked on getting out baby diaper stains! It's even worked better than bleach sometimes and much safer to use on my colored clothes.
The last homemade alternative item I have made recently was the liquid version of Zander's eczema soap. We found this type of bar soap for Zander's skin at Target, but unfortunately he doesn't understand that he can't use the regular Johnson and Johnson soap like Gabe and Calla. One thing the Doctor told us after diagnosing Zander's eczema was to make sure he didn't use regular soap or to sit in soapy bath water. Ever since then I've been trying to find a way to make his bar soap more accessible. I found this blog post that addressed the same issues. Since making it, I have put mason jars of soap in the kitchen and bathroom to make sure that Zander washes with "his" soap. I'm almost positive you could use this recipe to turn any bar of soap into a liquid.
A new website that I've found is called Very Jane. It has daily deals (kind of like a Groupon or Living Social) but offers items that are homemade. Have you ever seen Etsy? That's a website where merchants can buy and sell things that are homemade. Very Jane runs daily sales on items you can often find on Etsy. Everyone still with me? Okay. On Very Jane, I've been finding all kinds of cool things and getting inspiration to make things. Recently, I've purchased homemade sewn booties for Calla (2 for $14), a couple different sets of hair bows (one was 4 for $4, one was 3 for $3) and lavender oil (one 9 oz vial with three vitamin E chapsticks for $10).
Why did I buy the bows when I could make them? Good question. First, at $1 a bow it can't get much cheaper. It's pretty hard to buy the supplies for cheaper than that. Mostly, that's because the supplies you have to buy come in packs that make multiple bows, not just one. I don't mind buying big bags of alligator clips or ribbon because I can use them in multiple ways. With fabric, you can only use it so many times until you have excess. For example, I bought red and green felt for Christmas bows and rosettes when I made my Christmas wreath. I still have a huge excess of red and green felt despite using the fabric in many different ways. How many red and green bows and rosette hair clips can Calla have? So in this case, buying individual bows at $1 each is much easier than purchasing multiple yards of different color fabric and having excess.
The lavender oil I bought to put in my homemade cleaning supplies and body scrubs. It is always optional (as it's a scent) in adding to creams, but I didn't know it also has antibacterial properties. So I have been adding it to my cleaning solution (1 1/2 cups hot water, 2 tbs soap and 1/4 cup white vinegar, 20 drops lavender oil) to help sanitize my counter tops. Lavender is also a natural insect repellent, so I envision myself using it in the summer when the kids are outside.
I have started stock piling our freezer with pre-made meals. Last Thursday, I bought lots of meat in bulk and spent all of nap time (a couple hours) cutting, pre-cooking and organizing meals out of that meat. We now approximately 10 "meals" that just need to be cooked. Chicken, steak and pork are all frozen in different marinades that need to be thawed. Some of the steak and hamburger I left untouched so I could use it however I wanted to later, but it's reassuring to me that I have some things already planned out. So much stress is derived from staring blankly into my refrigerator and freezer and trying to brainstorm a meal. Now, all I have to do is grab a bag the night before, put it in the fridge and cook it the next day. I really like this website: Fearless Freezer Cooking. There are tons of ideas and recipes for preparing freezer meals. I am all about the "dump" recipes, where you just put all the ingredients together in the bag and freeze it. My next household purchase will be a Food Saver, I think. While I'm making all these meals to freeze, I'm terrified they will be ruined with freezer burn. Does anyone have one they recommend?
Another thing I've been making in bulk and freezing is tomato sauce. I really despise buying individual jars of spaghetti sauce (especially since my kids and husband will eat ANYTHING with red sauce on it) and I dislike how expensive it can get. I got an awesome recipe from my friend Krystal and made a huge batch. While I cooked it for a couple hours on the stove top, I bet you could cook it on low all day in a crock pot (and next time, I think that's what I'll do). It's really just a baseline recipe, you can add or subtract seasonings to customize it to your own tastes. Also I love that you can use it as a pizza sauce too. I like a thinner sauce, but if you want you can always add some tomato paste until you reach your desired consistency.
Krystal's Tomato Sauce
(This is what I used and it made around 4 to 4 1/2 jars of tomato sauce)
2 big cans of whole peeled tomatoes
(Ideally you would use crushed tomatoes, but I couldn't find any in the brand I wanted, so I used whole and then mashed them up with a potato masher after the sauce had simmered for about an hour.)
4 cans tomato sauce
(You want to have a 1:1 ratio of crushed/whole tomatoes to sauce).
1/2 onion
(diced as small as you can get it)
1 clove of garlic
(peeling, smashed and minced)
Optional add in's - basil, rosemary, thyme, oregano, olive oil
I put all the ingredients in a large pot and brought it to a simmer. After simmering it for an hour, I mashed up the tomatoes. Taste it as it simmers for seasoning. If you feel like the sauce is too acidic, add one tablespoon of sugar. Simmer for 15 minutes. Taste the sauce again. Add another tablespoon of sugar if necessary.
Another recipe that I got from Krystal is her famous (I say famous because she's well known for it, and it really is a genius idea) ravioli lasagna. It is delicious and a fantastic and much easier spin on a regular lasagna. I like it better, actually, because it's much less work and the noodles have a more definitive taste. You can make it anyway you want. Add spinach and mushrooms instead of meat for a vegetarian option. Eat half and freeze the other half for later. Love it. Making it again soon.
Krystal's Famous Ravioli Lasagna
(This is how I made it in a 9x13 pan)
2 bags frozen cheese ravioli
(The pasta really needs to be frozen otherwise it's too soft to stand up to the baking)
1 lb ground mild ground Italian sausage
(Krystal uses hot, but I use mild for my small children)
1 lb ground hamburger
(I only used 1/2 pound because it was all I had)
1 lb shredded mozzarella cheese
2 jars spaghetti sauce
You prepare this similarly to a normal lasagna, except you use the ravioli instead of the lasagna noodles and you don't use any ricotta cheese. Preheat your oven to 400 degrees and spray down your 9x13 pan with oil. Brown the meats, drain and set aside. Boil the ravioli half way, so they still can absorb the sauce while you cook the pan in the oven. Drain the ravioli and set aside. Once you have all the lasagna components, start assembling it. Cover the bottom of the pan with a little sauce (so the noodles don't stick to the bottom), then a layer of meat, a layer of sauce and a layer of mozzarella cheese. Repeat the layers until your ingredients are used. Then cover your dish with aluminum foil (make sure to tent the foil so it doesn't touch the cheese on the top) and bake until the cheese is melted and the lasagna is bubbling.
Clean Eating Cranberry Muffins
As I said in earlier posts, I have been trying to choose healthy alternatives to using processed sugar and white flour. One recipe I stumbled upon and have fallen in love with is the one linked above, clean eating cranberry muffins. This recipe uses whole fresh cranberries, but I think you could substitute dried cranberries. I love how moist these muffins stay, even days after baking. I have never gotten the recipe to make 24 (like it says on the website). Both times I've made them, I've filled the muffin tin half full and gotten 18 out of the dough. They freeze really well and only take a couple hours to thaw on a counter top. Recently we ate at a bagel place that boasted about a "power" bagel. It was made of wheat flour and was chocked full of dried fruits and nuts. I thoroughly enjoyed it. I kept that bagel in mind while baking this last batch of cranberry muffins. I added raisins, dates, chopped walnuts and sprinkled the tops of the muffins with sunflower seeds. They are definitely delicious and I enjoy the healthy aspect too!
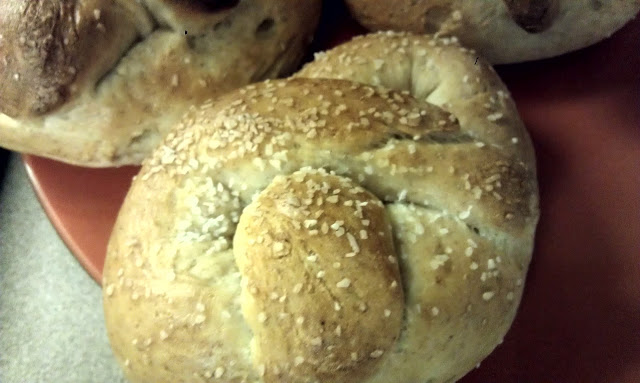
Clean Eating Soft Preztels
Another baked item from this website was the soft pretzel. I wanted to make a fun snack for the kids and succeeded with this recipe. They turned out delicious, we topped one batch with salt and another batch with a honey and cinnamon glaze. These did not freeze as well as the muffins and ended up more dried out than I wanted. Next time, I think I might make pretzel sticks so the kids can dip them in different sauces. That might be a fun idea for when friends come over or for a birthday party.
Clean Eating Chocolate Cupcakes
This link is actually for a clean birthday cake, but in the comments, this blogger says you can add cocoa powder to the recipe for a chocolate version. Also, I scooped the dough into muffin liners for cupcakes. They were originally for Gabe's school Valentine's party, but they ended up staying at our house. The recipe didn't make quite as many as I needed and I ended up with 18 cupcakes (not enough for the class of 22). So I used a box cake mix for his class and we kept the chocolate "muffins" for ourselves. Again, I was surprised at how moist and sweet the cupcakes are despite the lack of sugar. I highly recommend this recipe for birthday cakes in the future.
Greek Yogurt brownies
I made this recipe a LONG time ago when it was first published in Shape magazine. It was the first time I had heard of Greek yogurt and I remember trying it and wondering why in the world someone would use something so sour in a brownie recipe (I still think you have to add something sweet in Greek yogurt - honey, raspberry jam, something). Since I have been on this health kick, I decided to look it up and try it again. I will warn you it's not like your average brownie. It makes a much more dense, almost cake, bar. Also because of the dairy in it, I recommend that it's refrigerated. While it will never win a brownie contest, it is perfect if you have a chocolate craving and don't want to feel too guilty about the calories.
Pizza roll ups
We have been eating SO much pizza lately. Like once a week. What can I say? It's fast, easy and something the kids will eat. without complaint. Now that I'm making our dough, I can whip out a pizza pretty fast and call dinner good within 20 minutes. However, I've been getting bored with the regular cheese and pepperoni option. So I found a way to change it up a little. To make the pizza roll ups, you make a pizza like you normally would. Roll out your dough (shaping it into a rectangle makes the rolling up part easiest), top with sauce and whatever toppings you want. Then roll the dough, like you would a cinnamon roll. Take it slow to ensure that the dough is being rolled tightly and evenly. Once it's a log, cut it into 1 1/2 inch pieces and place (spaced out) on a greased pan. I cooked my pizza spirals at 350 for 10 minutes. It was a delicious change. The boys liked how easy they could pick it up, compared to regular pizza. And Zander (my crust fiend) loved that it had more dough than a regular piece. This would also be a good freezer meal. Once your dough is rolled into the log with sauce and toppings, put it in a freezer bag and save it until you need it. Then thaw it out, cut it and bake.

Last recipe, I promise. I stumbled on this recipe while I was nursing Calla one morning and decided instantly that I would try it. Cinnamon rolls are one of those foods that make even the grumpiest mornings a little more tolerable. No rise cinnamon rolls make Moms a little less grumpy. I was a little worried about how many cinnamon rolls this recipe would yield, so I doubled the recipe. While we had more than enough with one batch, I prepared the second batch and froze it to save for a later date. Because you use all wheat flour, it's not the light and fluffy cinnamon roll dough, but you can't really go wrong with butter, cinnamon and brown sugar. I ended up using a can of frosting I had in the cupboard instead of the included icing recipe, but you can definitely use whatever you want or nothing at all.
Upcoming - I have pictures of my successful attempts in bow making, Gabe's sight word game and my version of an art work board for the kids. Also, there will be pictures from Gabe's soccer games.
I have made my laundry detergent, but have had a couple set backs in making it. The recipe I used was very unspecific about the size of the bar of soap you use and unfortunately my bar of soap was twice the size of the bar called for in the recipe. What this does is thicken the detergent from a gel to almost a solid. However, after some research I found that I can still use it by diluting it in a smaller container. I scooped out four cups of detergent into an old empty plastic juice container (filling it about halfway with detergent) and then filled the other half (leaving a little room for bubbles) with piping hot water. Then I shook the mixture to help dissolve and dilute the soap. I have used the mixture twice since diluting it and I am pleased with the results. The clothes are getting clean and unstained. I love that I don't have to worry about the dye in the detergent anymore. From now on, I think I will use this recipe to make my detergent, but I definitely have awhile before I'll need anymore.
I also found that dishwasher detergent ingredients are very similar to laundry detergent and have made my first batch of that. Here is the link I used to make mine. I love the idea of adding vinegar to the bottom of the dishwasher, it has made my glasses sparkling clean. From the same blogger, I found a homemade stain remover recipe. I tried using a squirt bottle to spray this on our stained clothing, but the baking soda clogged the straw. I found that just shaking the bottles contents and pouring a little onto the stained area works just as well. I rub the stain a little and let it sit for a couple hours before I put it in the washing machine. I'm really surprised how well it's worked on getting out baby diaper stains! It's even worked better than bleach sometimes and much safer to use on my colored clothes.
The last homemade alternative item I have made recently was the liquid version of Zander's eczema soap. We found this type of bar soap for Zander's skin at Target, but unfortunately he doesn't understand that he can't use the regular Johnson and Johnson soap like Gabe and Calla. One thing the Doctor told us after diagnosing Zander's eczema was to make sure he didn't use regular soap or to sit in soapy bath water. Ever since then I've been trying to find a way to make his bar soap more accessible. I found this blog post that addressed the same issues. Since making it, I have put mason jars of soap in the kitchen and bathroom to make sure that Zander washes with "his" soap. I'm almost positive you could use this recipe to turn any bar of soap into a liquid.
A new website that I've found is called Very Jane. It has daily deals (kind of like a Groupon or Living Social) but offers items that are homemade. Have you ever seen Etsy? That's a website where merchants can buy and sell things that are homemade. Very Jane runs daily sales on items you can often find on Etsy. Everyone still with me? Okay. On Very Jane, I've been finding all kinds of cool things and getting inspiration to make things. Recently, I've purchased homemade sewn booties for Calla (2 for $14), a couple different sets of hair bows (one was 4 for $4, one was 3 for $3) and lavender oil (one 9 oz vial with three vitamin E chapsticks for $10).
Why did I buy the bows when I could make them? Good question. First, at $1 a bow it can't get much cheaper. It's pretty hard to buy the supplies for cheaper than that. Mostly, that's because the supplies you have to buy come in packs that make multiple bows, not just one. I don't mind buying big bags of alligator clips or ribbon because I can use them in multiple ways. With fabric, you can only use it so many times until you have excess. For example, I bought red and green felt for Christmas bows and rosettes when I made my Christmas wreath. I still have a huge excess of red and green felt despite using the fabric in many different ways. How many red and green bows and rosette hair clips can Calla have? So in this case, buying individual bows at $1 each is much easier than purchasing multiple yards of different color fabric and having excess.
The lavender oil I bought to put in my homemade cleaning supplies and body scrubs. It is always optional (as it's a scent) in adding to creams, but I didn't know it also has antibacterial properties. So I have been adding it to my cleaning solution (1 1/2 cups hot water, 2 tbs soap and 1/4 cup white vinegar, 20 drops lavender oil) to help sanitize my counter tops. Lavender is also a natural insect repellent, so I envision myself using it in the summer when the kids are outside.
I have started stock piling our freezer with pre-made meals. Last Thursday, I bought lots of meat in bulk and spent all of nap time (a couple hours) cutting, pre-cooking and organizing meals out of that meat. We now approximately 10 "meals" that just need to be cooked. Chicken, steak and pork are all frozen in different marinades that need to be thawed. Some of the steak and hamburger I left untouched so I could use it however I wanted to later, but it's reassuring to me that I have some things already planned out. So much stress is derived from staring blankly into my refrigerator and freezer and trying to brainstorm a meal. Now, all I have to do is grab a bag the night before, put it in the fridge and cook it the next day. I really like this website: Fearless Freezer Cooking. There are tons of ideas and recipes for preparing freezer meals. I am all about the "dump" recipes, where you just put all the ingredients together in the bag and freeze it. My next household purchase will be a Food Saver, I think. While I'm making all these meals to freeze, I'm terrified they will be ruined with freezer burn. Does anyone have one they recommend?
Another thing I've been making in bulk and freezing is tomato sauce. I really despise buying individual jars of spaghetti sauce (especially since my kids and husband will eat ANYTHING with red sauce on it) and I dislike how expensive it can get. I got an awesome recipe from my friend Krystal and made a huge batch. While I cooked it for a couple hours on the stove top, I bet you could cook it on low all day in a crock pot (and next time, I think that's what I'll do). It's really just a baseline recipe, you can add or subtract seasonings to customize it to your own tastes. Also I love that you can use it as a pizza sauce too. I like a thinner sauce, but if you want you can always add some tomato paste until you reach your desired consistency.
Krystal's Tomato Sauce
(This is what I used and it made around 4 to 4 1/2 jars of tomato sauce)
2 big cans of whole peeled tomatoes
(Ideally you would use crushed tomatoes, but I couldn't find any in the brand I wanted, so I used whole and then mashed them up with a potato masher after the sauce had simmered for about an hour.)
4 cans tomato sauce
(You want to have a 1:1 ratio of crushed/whole tomatoes to sauce).
1/2 onion
(diced as small as you can get it)
1 clove of garlic
(peeling, smashed and minced)
Optional add in's - basil, rosemary, thyme, oregano, olive oil
I put all the ingredients in a large pot and brought it to a simmer. After simmering it for an hour, I mashed up the tomatoes. Taste it as it simmers for seasoning. If you feel like the sauce is too acidic, add one tablespoon of sugar. Simmer for 15 minutes. Taste the sauce again. Add another tablespoon of sugar if necessary.
Another recipe that I got from Krystal is her famous (I say famous because she's well known for it, and it really is a genius idea) ravioli lasagna. It is delicious and a fantastic and much easier spin on a regular lasagna. I like it better, actually, because it's much less work and the noodles have a more definitive taste. You can make it anyway you want. Add spinach and mushrooms instead of meat for a vegetarian option. Eat half and freeze the other half for later. Love it. Making it again soon.
Krystal's Famous Ravioli Lasagna
(This is how I made it in a 9x13 pan)
2 bags frozen cheese ravioli
(The pasta really needs to be frozen otherwise it's too soft to stand up to the baking)
1 lb ground mild ground Italian sausage
(Krystal uses hot, but I use mild for my small children)
1 lb ground hamburger
(I only used 1/2 pound because it was all I had)
1 lb shredded mozzarella cheese
2 jars spaghetti sauce
You prepare this similarly to a normal lasagna, except you use the ravioli instead of the lasagna noodles and you don't use any ricotta cheese. Preheat your oven to 400 degrees and spray down your 9x13 pan with oil. Brown the meats, drain and set aside. Boil the ravioli half way, so they still can absorb the sauce while you cook the pan in the oven. Drain the ravioli and set aside. Once you have all the lasagna components, start assembling it. Cover the bottom of the pan with a little sauce (so the noodles don't stick to the bottom), then a layer of meat, a layer of sauce and a layer of mozzarella cheese. Repeat the layers until your ingredients are used. Then cover your dish with aluminum foil (make sure to tent the foil so it doesn't touch the cheese on the top) and bake until the cheese is melted and the lasagna is bubbling.
Clean Eating Cranberry Muffins
As I said in earlier posts, I have been trying to choose healthy alternatives to using processed sugar and white flour. One recipe I stumbled upon and have fallen in love with is the one linked above, clean eating cranberry muffins. This recipe uses whole fresh cranberries, but I think you could substitute dried cranberries. I love how moist these muffins stay, even days after baking. I have never gotten the recipe to make 24 (like it says on the website). Both times I've made them, I've filled the muffin tin half full and gotten 18 out of the dough. They freeze really well and only take a couple hours to thaw on a counter top. Recently we ate at a bagel place that boasted about a "power" bagel. It was made of wheat flour and was chocked full of dried fruits and nuts. I thoroughly enjoyed it. I kept that bagel in mind while baking this last batch of cranberry muffins. I added raisins, dates, chopped walnuts and sprinkled the tops of the muffins with sunflower seeds. They are definitely delicious and I enjoy the healthy aspect too!
Clean Eating Soft Preztels
Another baked item from this website was the soft pretzel. I wanted to make a fun snack for the kids and succeeded with this recipe. They turned out delicious, we topped one batch with salt and another batch with a honey and cinnamon glaze. These did not freeze as well as the muffins and ended up more dried out than I wanted. Next time, I think I might make pretzel sticks so the kids can dip them in different sauces. That might be a fun idea for when friends come over or for a birthday party.

This link is actually for a clean birthday cake, but in the comments, this blogger says you can add cocoa powder to the recipe for a chocolate version. Also, I scooped the dough into muffin liners for cupcakes. They were originally for Gabe's school Valentine's party, but they ended up staying at our house. The recipe didn't make quite as many as I needed and I ended up with 18 cupcakes (not enough for the class of 22). So I used a box cake mix for his class and we kept the chocolate "muffins" for ourselves. Again, I was surprised at how moist and sweet the cupcakes are despite the lack of sugar. I highly recommend this recipe for birthday cakes in the future.
Greek Yogurt brownies
I made this recipe a LONG time ago when it was first published in Shape magazine. It was the first time I had heard of Greek yogurt and I remember trying it and wondering why in the world someone would use something so sour in a brownie recipe (I still think you have to add something sweet in Greek yogurt - honey, raspberry jam, something). Since I have been on this health kick, I decided to look it up and try it again. I will warn you it's not like your average brownie. It makes a much more dense, almost cake, bar. Also because of the dairy in it, I recommend that it's refrigerated. While it will never win a brownie contest, it is perfect if you have a chocolate craving and don't want to feel too guilty about the calories.
Pizza roll ups
We have been eating SO much pizza lately. Like once a week. What can I say? It's fast, easy and something the kids will eat. without complaint. Now that I'm making our dough, I can whip out a pizza pretty fast and call dinner good within 20 minutes. However, I've been getting bored with the regular cheese and pepperoni option. So I found a way to change it up a little. To make the pizza roll ups, you make a pizza like you normally would. Roll out your dough (shaping it into a rectangle makes the rolling up part easiest), top with sauce and whatever toppings you want. Then roll the dough, like you would a cinnamon roll. Take it slow to ensure that the dough is being rolled tightly and evenly. Once it's a log, cut it into 1 1/2 inch pieces and place (spaced out) on a greased pan. I cooked my pizza spirals at 350 for 10 minutes. It was a delicious change. The boys liked how easy they could pick it up, compared to regular pizza. And Zander (my crust fiend) loved that it had more dough than a regular piece. This would also be a good freezer meal. Once your dough is rolled into the log with sauce and toppings, put it in a freezer bag and save it until you need it. Then thaw it out, cut it and bake.

Last recipe, I promise. I stumbled on this recipe while I was nursing Calla one morning and decided instantly that I would try it. Cinnamon rolls are one of those foods that make even the grumpiest mornings a little more tolerable. No rise cinnamon rolls make Moms a little less grumpy. I was a little worried about how many cinnamon rolls this recipe would yield, so I doubled the recipe. While we had more than enough with one batch, I prepared the second batch and froze it to save for a later date. Because you use all wheat flour, it's not the light and fluffy cinnamon roll dough, but you can't really go wrong with butter, cinnamon and brown sugar. I ended up using a can of frosting I had in the cupboard instead of the included icing recipe, but you can definitely use whatever you want or nothing at all.
Upcoming - I have pictures of my successful attempts in bow making, Gabe's sight word game and my version of an art work board for the kids. Also, there will be pictures from Gabe's soccer games.
Subscribe to:
Posts (Atom)